# 服务端安装教程
# 一、宝塔面板
# 1. 安装宝塔面板
官网下载安装。链接
if [ -f /usr/bin/curl ];then curl -sSO https://download.bt.cn/install/install_panel.sh;else wget -O install_panel.sh https://download.bt.cn/install/install_panel.sh;fi;bash install_panel.sh ed8484bec
1
# 2. 安装后得到宝塔面板信息
# 3. 登录宝塔面板绑定手机号
# 二、环境安装
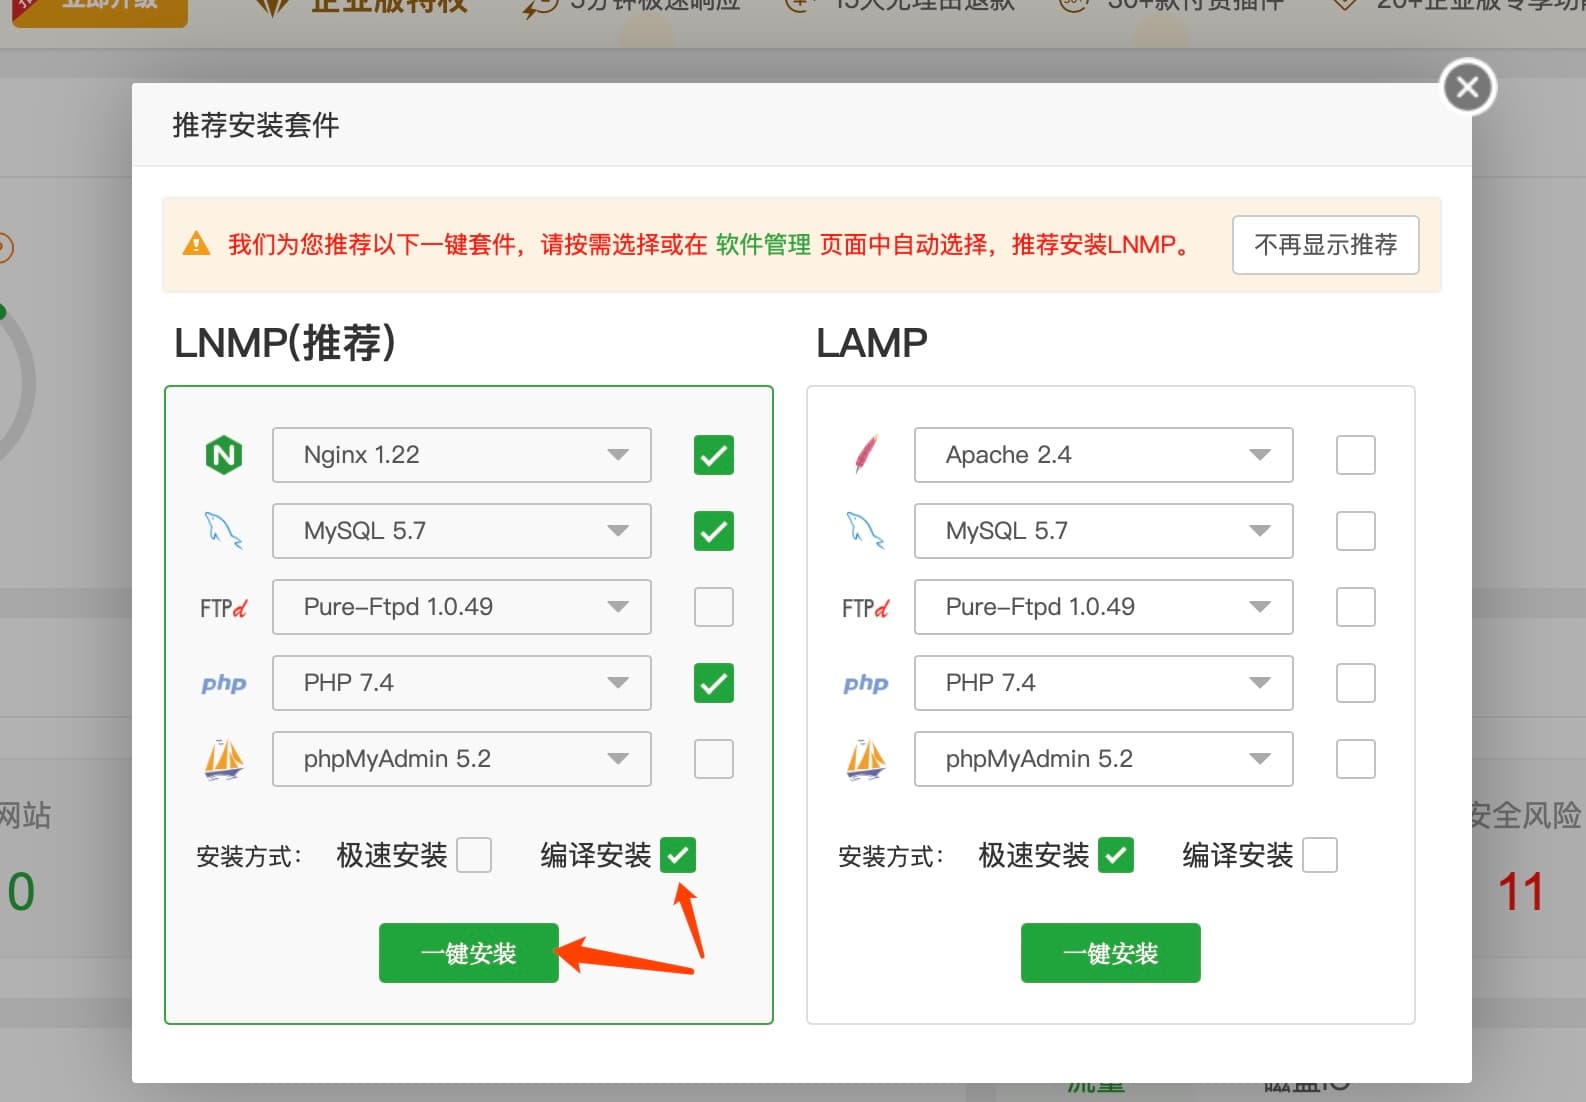
# 1. 选择LNMP
- mysql选择5.7
- PHP选择8.1
- nginx选择默认
- 选择编译安装(重要)
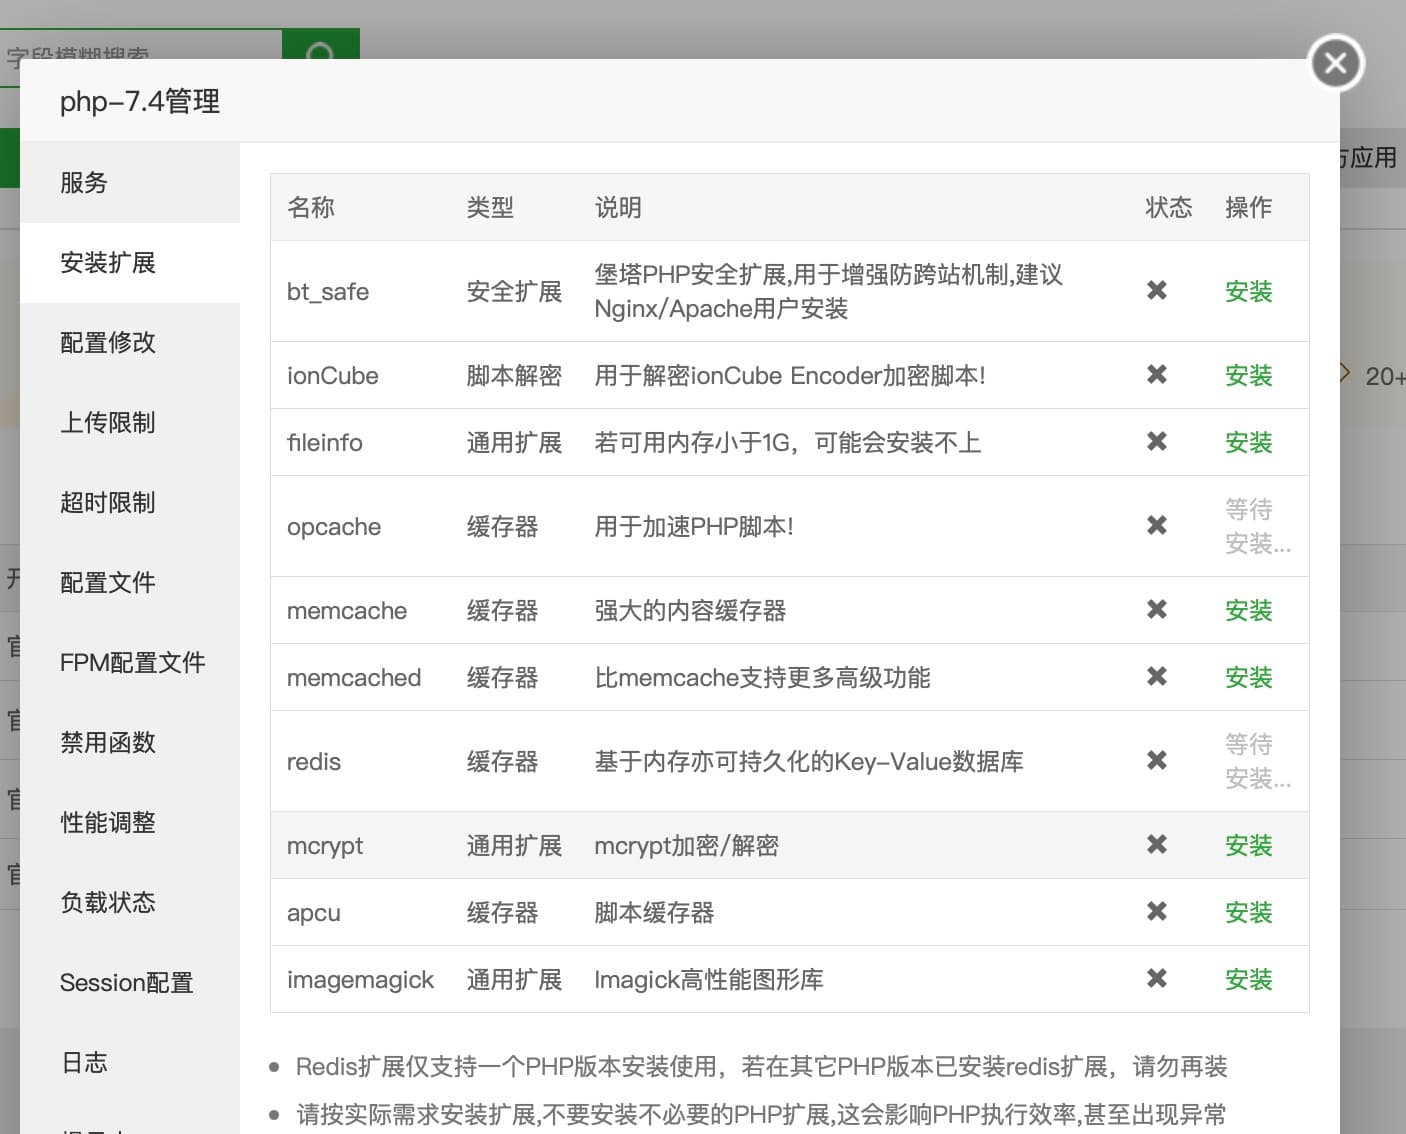
# 2. 安装以下php扩展
fileinfo
opcache
redis
exif
1
2
3
4
2
3
4
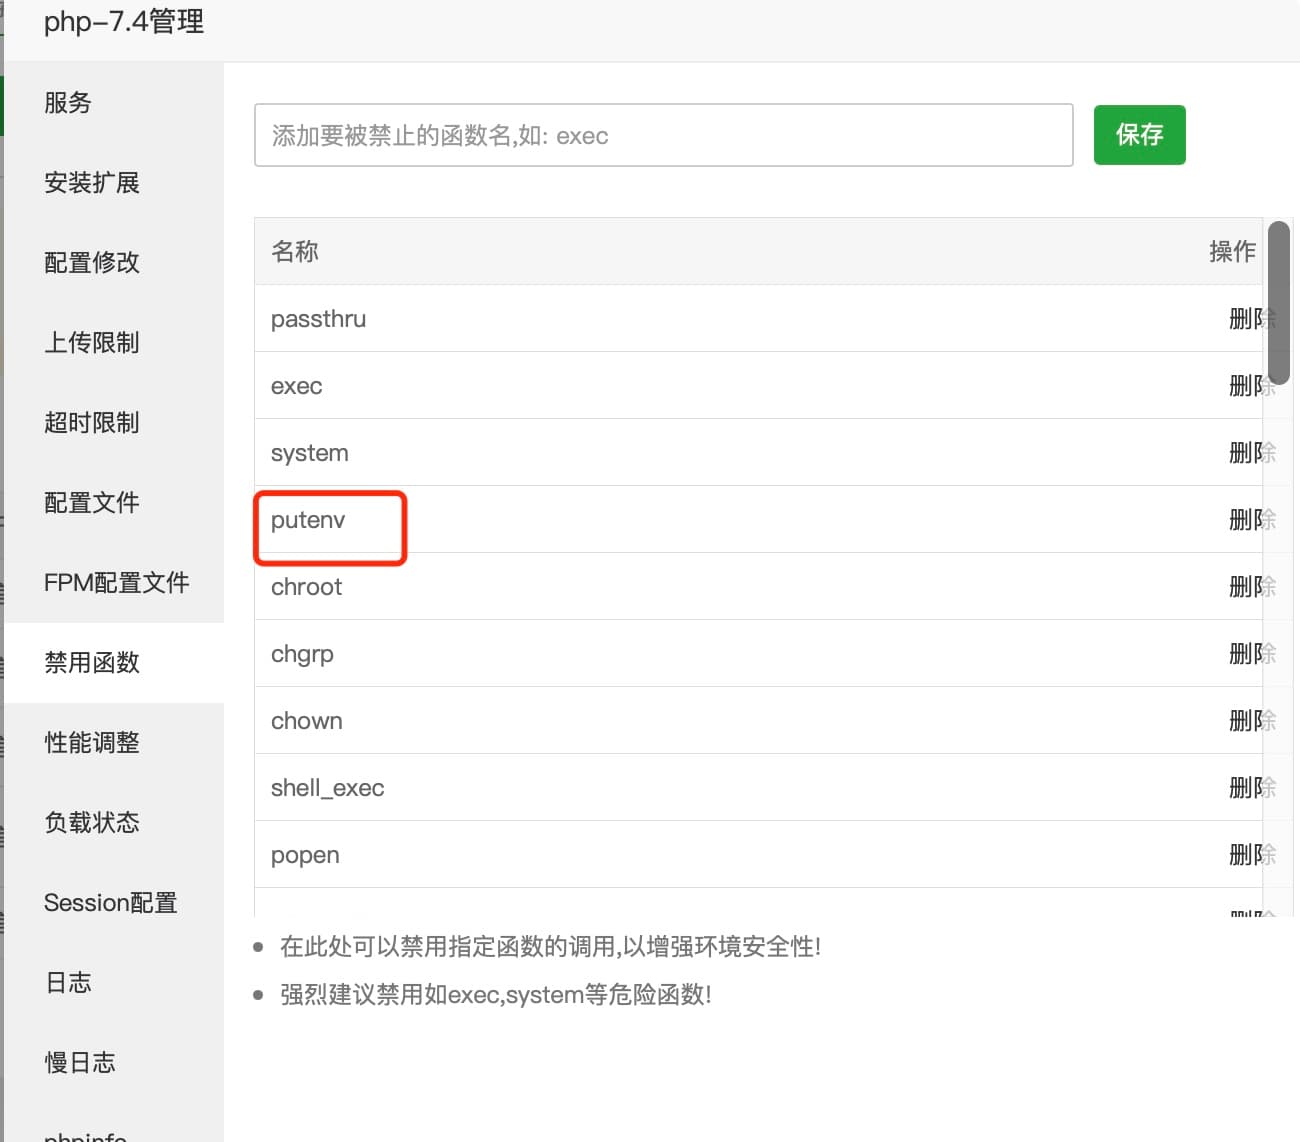
# 3. php去掉以下禁用函数
putenv
symlink
proc_open
shell_exec
1
2
3
4
2
3
4
# 三、拉取代码
# 1. git拉取代码
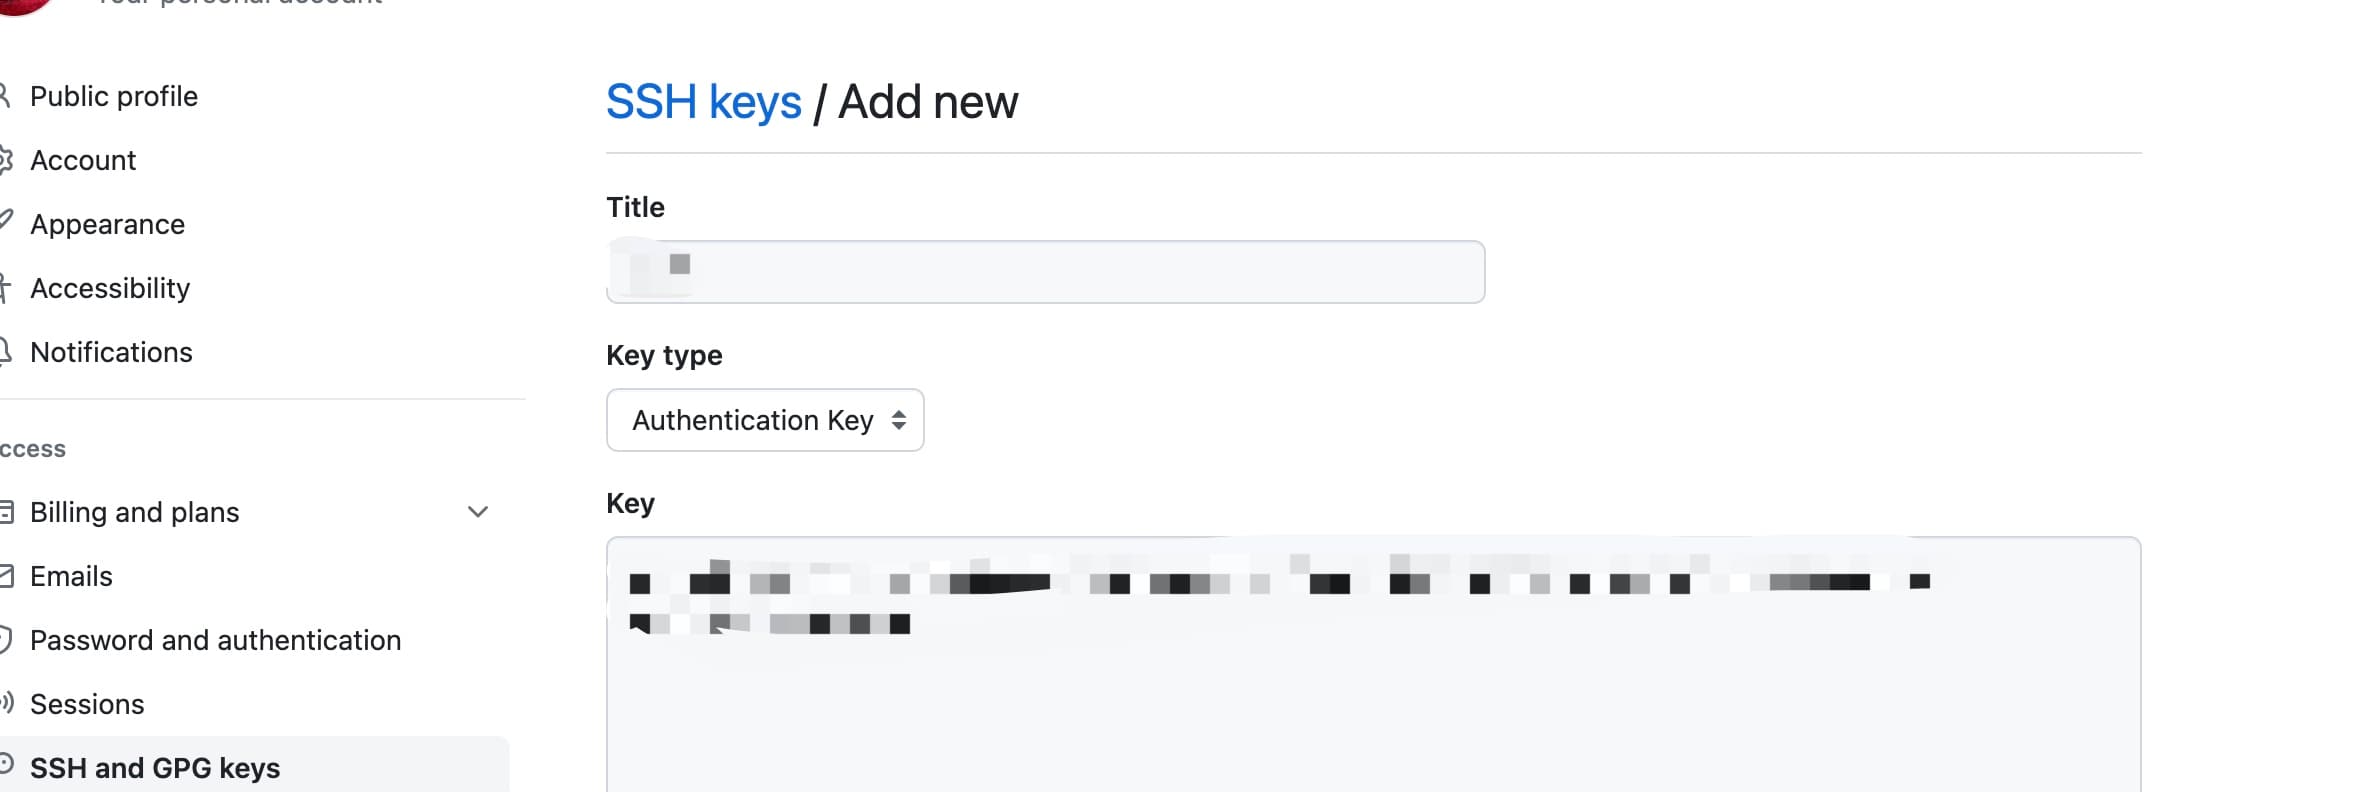
先加入github的ssh Github链接
ssh-keygen -t ed25519 -C "xx@xx.com" // 邮箱

eval "$(ssh-agent -s)"

ssh-add ~/.ssh/id_ed25519
1
2
3
4
5
2
3
4
5
复制 /root/.ssh/id_ed25519.pub 到
# 2. 拉取代码
cd /www/wwwroot/

git clone git@github.com:xx.git
1
2
3
2
3
# 四、宝塔的配置域名
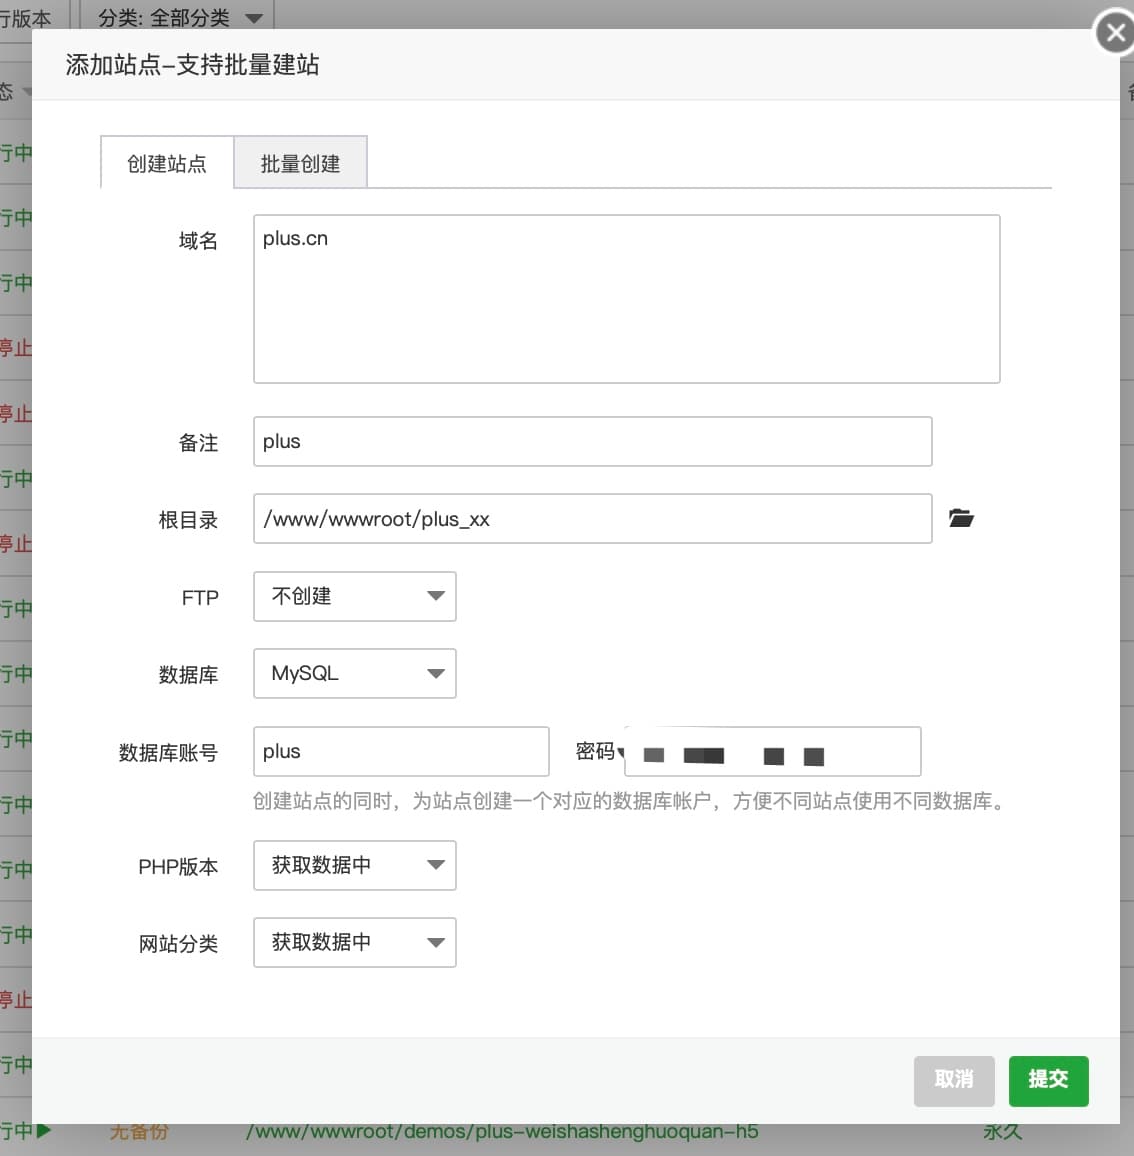
# 1. 添加站点
- 填写域名
- 根目录选择到代码目录
- 数据库选择Mysql
- 设置数据库账号密码
- 点击创建,并记住数据库账号密码
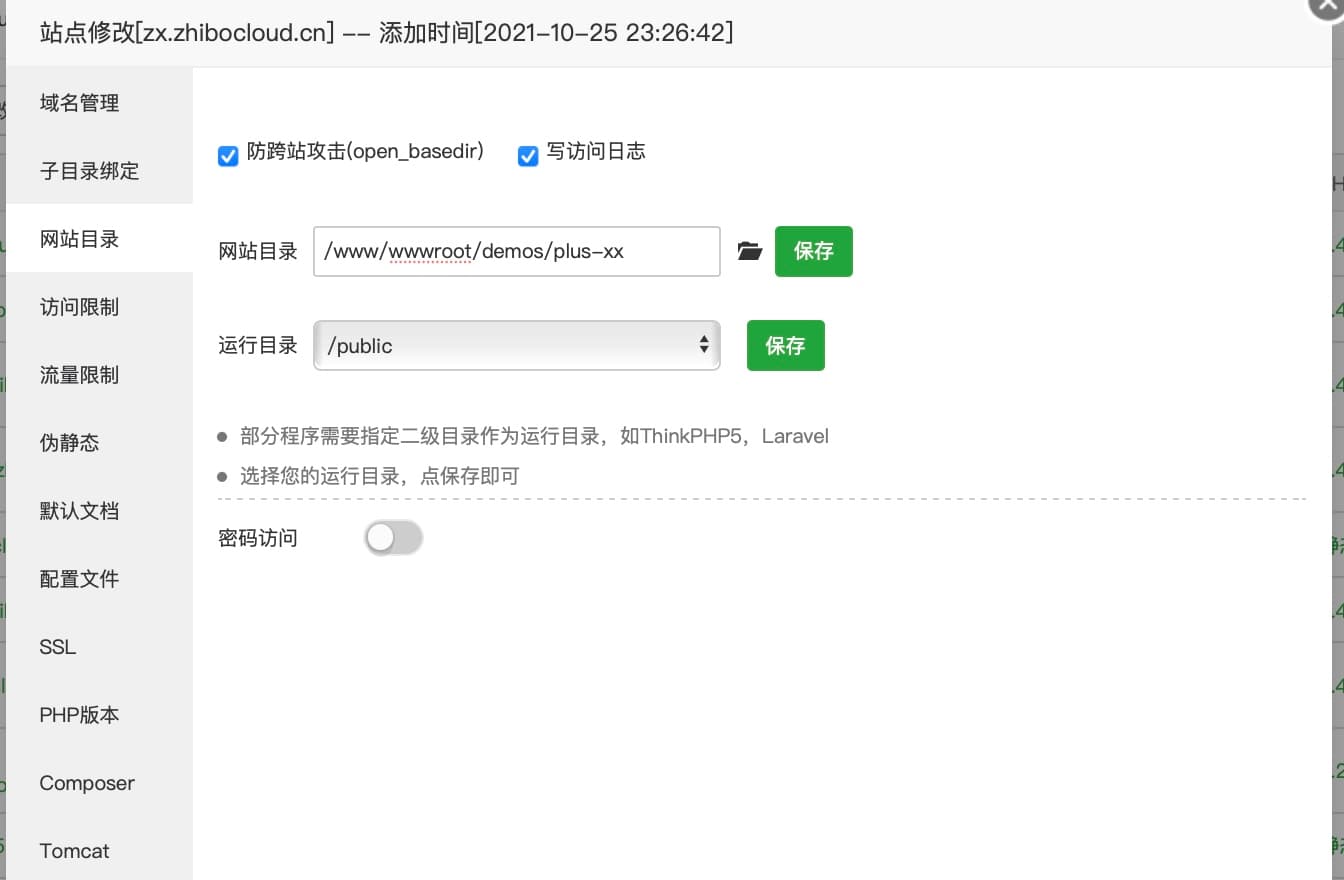
# 2. 站点修改
- 网站目录设置,运行目录设置成 /public
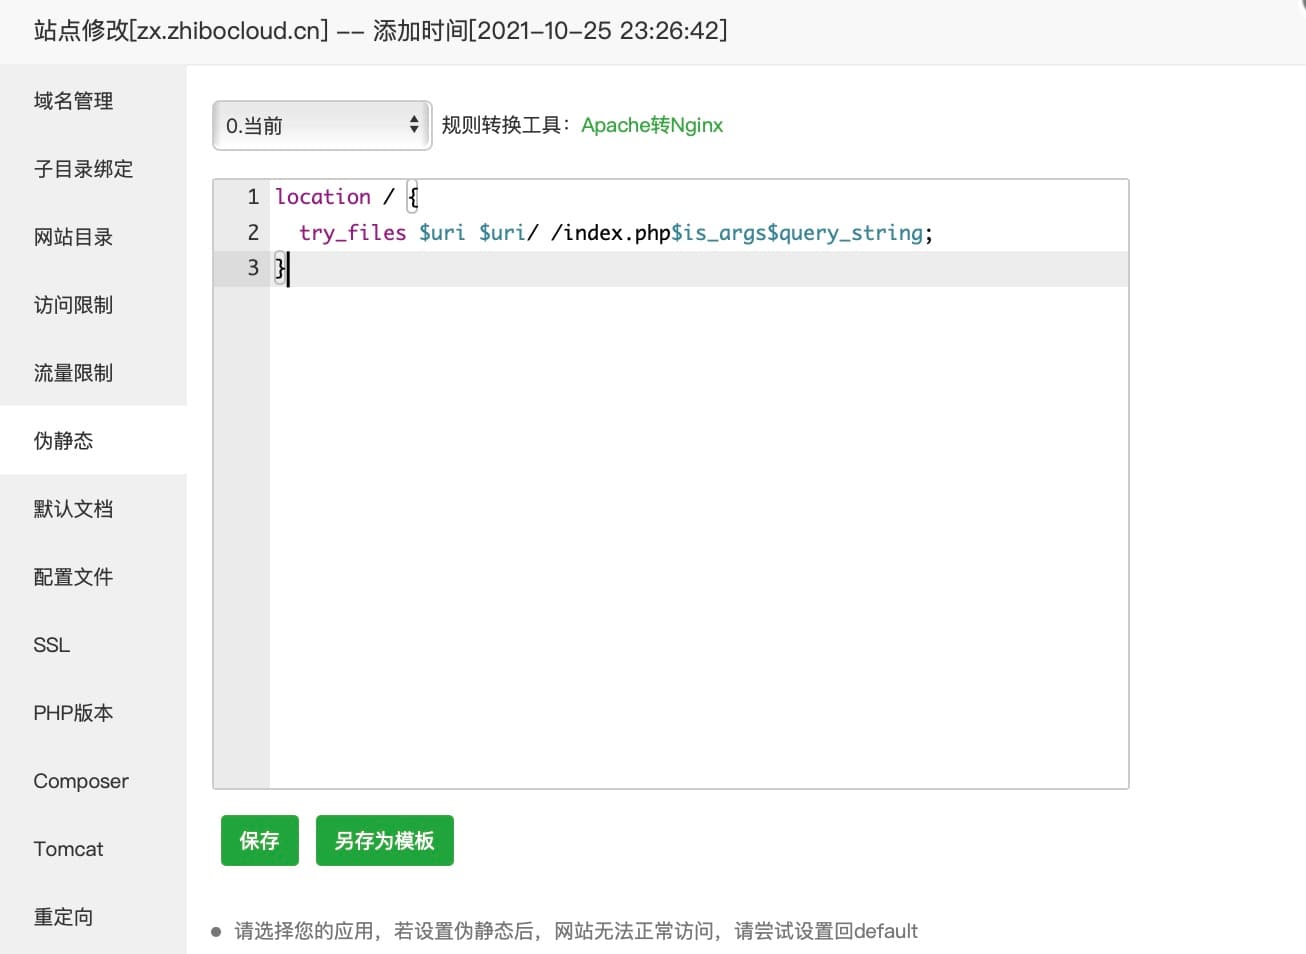
- 设置伪静态
location / {
	try_files $uri $uri/ /index.php$is_args$query_string;
}
1
2
3
2
3
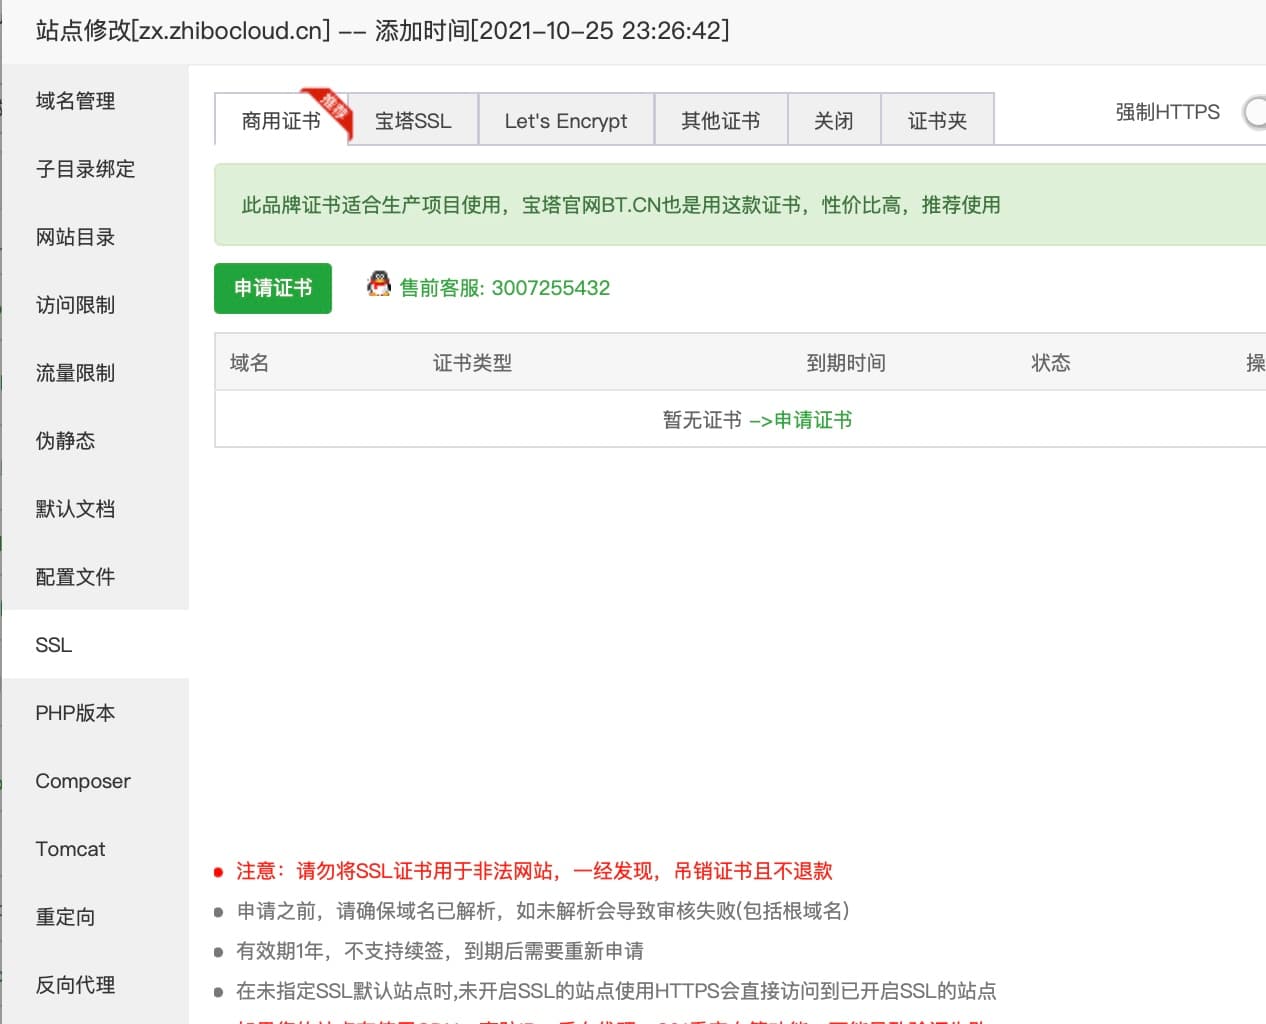
# 3. 设置ssl
# 四、配置以及命令安装
# 1. 复制配置文件
cd /www/wwwroot/xx
cp storage/configure/plus.yml.example storage/configure/plus.yml

cp storage/configure/.env.example storage/configure/.env
1
2
3
4
2
3
4
# 2. 配置plus.yml文件
主要是修改以下参数
app.env # 测试:local,生产:production
app.debug # 开启Debug
app.url # 域名,带https

cache.default # 改为 redis
cache.prefix # 同一个服务器多个ts,就需要修改

database.mysql # mysql信息

filesystems.disks.public.url # https://域名/storage
1
2
3
4
5
6
7
8
9
10
2
3
4
5
6
7
8
9
10
# 3. 编译
命令行输入以下命令
cd /www/wwwroot/xx

# 安装依赖
composer install

# 迁移数据库
php artisan migrate

# 数据库初始化数据
php artisan db:seed

# 创建新密钥
php artisan app:key-generate

# 上传文件软链
php artisan storage:link

# 发布资源
php artisan vendor:publish --all

#小程序端素材初始化
php artisan wmc:init

# 设置权限
chown -R www:www storage
chown -R www:www vendor
chown -R www:www public
chown -R www:www bootstrap/cache
1
2
3
4
5
6
7
8
9
10
11
12
13
14
15
16
17
18
19
20
21
22
23
24
25
26
27
28
2
3
4
5
6
7
8
9
10
11
12
13
14
15
16
17
18
19
20
21
22
23
24
25
26
27
28
# 五、访问域名
# 1. 目前直接在网站访问域名应该可以直接访问
# 2. 默认后台管理员账号密码
用户名:root 密码:root
# 六、定时任务
crontab -u www -e

复制一下内容:注意代码路径

*/1 * * * * cd /www/wwwroot/plus_xxx && php artisan schedule:run >> /dev/null 2>&1
1
2
3
4
5
6
2
3
4
5
6
# 七、完毕
# 1. 注意
- 默认telescope是开启的,可以在 代码目录/storage/configure/.env 加配置
TELESCOPE_ENABLED=false
1
← TS3总览 windows本地安装 →